
Flor y Selva Community
Naranjal, Ecuador
Portable Water System
Deploy's tank is specifically designed to reach places that are difficult to access, providing a cost-effective and efficient way to purify water without relying on extensive infrastructure.


Flor y Selva Community
14,000 Litre Water Tank Bundle x 3
Water Storage, Potable Water
Ready to Use in 2 Days
28.12.2022
Naranjal, Ecuador
Overview
By installing three 14,000 Litre Water Tank Bundles, Deploy kickstarted the construction of the first drinking water system for this community. First, these tanks will help to store the water coming from a nearby stream. Later in the construction, these tanks will be used to distribute treated clean water into the households of the community. Their water storage needs resulted in significant improvements in the residents' lives through the provision of clean drinking water and enhanced water storage capacity.
Application
The Flor y Selva Community is currently utilizing these tanks to distribute clean, treated drinking water to households within the community.
Installation Process
1. Hole Preparation: In preparation for the installation, the community dug 3 holes to semi-burry the tanks due to the water head requirements of the system.
2. Insta-Slab Preparation: To overcome the problem of muddy and uneven ground, the installation team used Insta-Slab, a reliable solution for creating a stable and level foundation to protect the tank. With the Insta-Slab's remarkable flexibility, it was able to fit perfectly onto the hole, ensuring a seamless fit. Pegs were used to secure Insta-Slab, preventing any shifting or movement and ensuring its stability.
3. Tank Inflation: After ensuring the base's security, the tank is prepared for installation. It is inflated on the ground, and once fully inflated, the installation team proceeds to move the tank into the designated hole. As the tank possesses a large volume, it can be easily maneuvered and adjusted to the desired location during the inflation process.
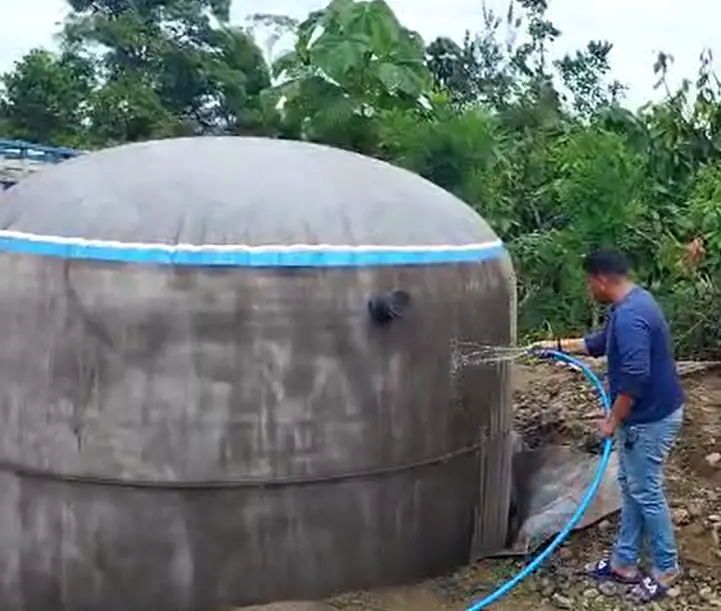
4. Tank Hydration: Once the tank was properly inflated, the tank surface required hydration to start the curing process. We sprayed water on the tank walls three times to ensure maximum strength and durability. The installation team monitored the hardening process closely to ensure the tank attained its intended strength and hardness.
5. Roof Structure Installation: Once the tank had cured and hardened overnight, the installation team inserted fibreglass poles as an internal structure for added support and stability. These poles were securely positioned within the tank before the team proceeded to close the lid. With the tank lid securely in place, the installation process was successfully completed, rendering the tank ready for the next steps of connecting it to the water source, storage, and subsequent distribution.